jsmastronomy
› Versão Portugues
› Processamento Gráfico & Tutorial
›
Processamento Gráfico de Astrofotos
An Example to Proccess Mars
|
|
Esta mensagem foi atualizada em .
This article was written to help a CN mate to enhance his proccessing of Jupiter. As I always say, the best tutorials to proccess astro-photos with Photohop can be seen in tutorial tab of http://www.imagingdeepsky.com
I haven't an unique pattern or procedure to work with astrophotos. Each case is a unique case. I will tell what I did with his photo, that is a final JPEG photo. Some ideas and tips can be usefull. I use Photoshop CS3. But many (or maybe) all of tools and ressource used can be find in the last version of GIMP, a free powerfull graphic proccesss, and very similar to Photoshop. My final proccess and original image: 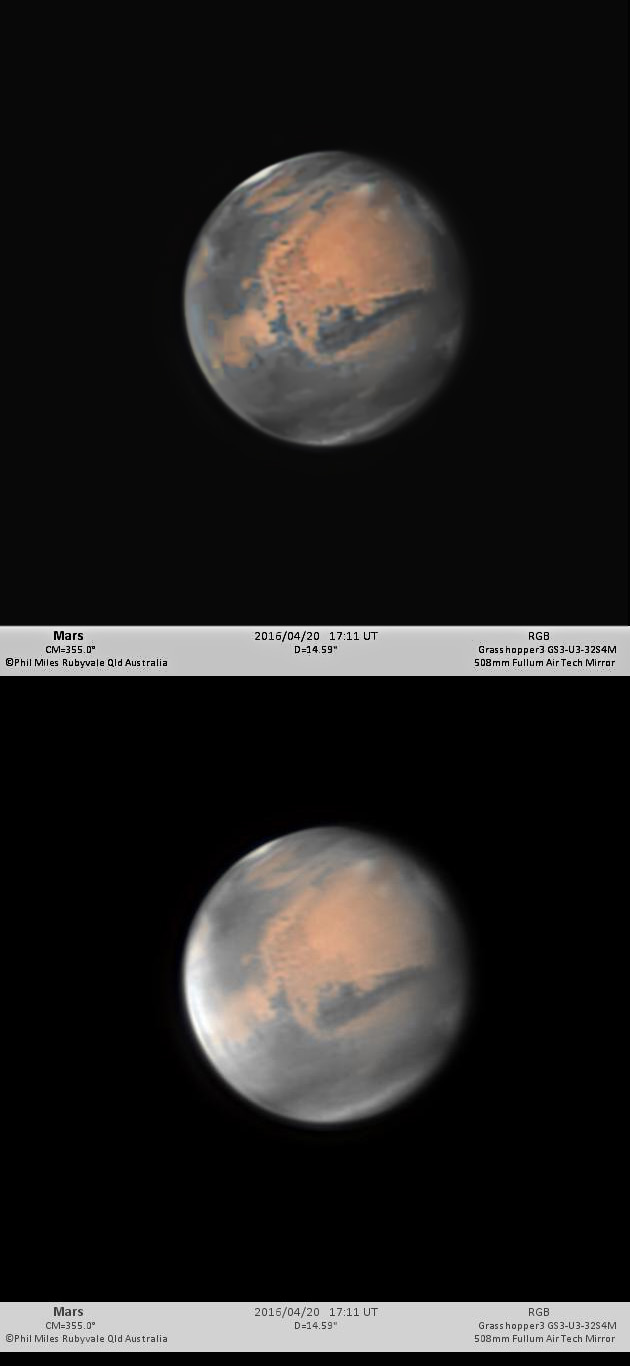 1) what I saw:It was very bright with some areas very white. So, the first adjust is to reduce this brightness. Always I work with duplicate layer to don't loose the original. When solved one issue I duplicate the image and flat the layers (or merge the visible layers). Thus I never loose the original and prior work. To reduce the brightness of all photo I used selective color tool. Menu Image > Adjustment > Selective Color. I usually use a layer with this tool started by the icon marked by arrow. It is a good ressource, since I can make it active or not by setting its visibility. As you can see below, I did reduction of white and I had a better appearance of some areas.  But the polar area of Mars was reduced also. To correct it I will work with the mask to limit the total area of action.Below you see the layers. Actions of filter will be applied on the white area of mask layer. As it is full white, the action is on full image. 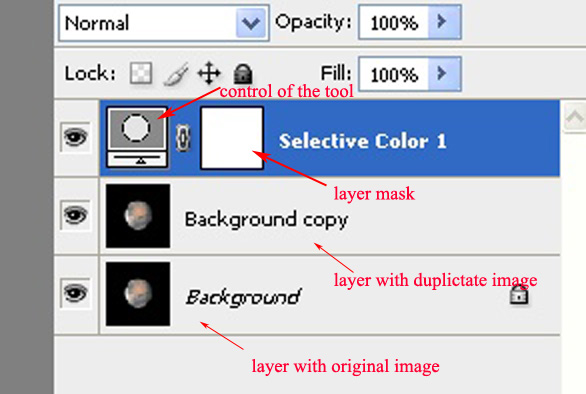 I will paint the area that I don't want action of filter with black color, and I will do a blur on this black painting to smooth the border. I click on the layer mask to select it and I use the brush tool 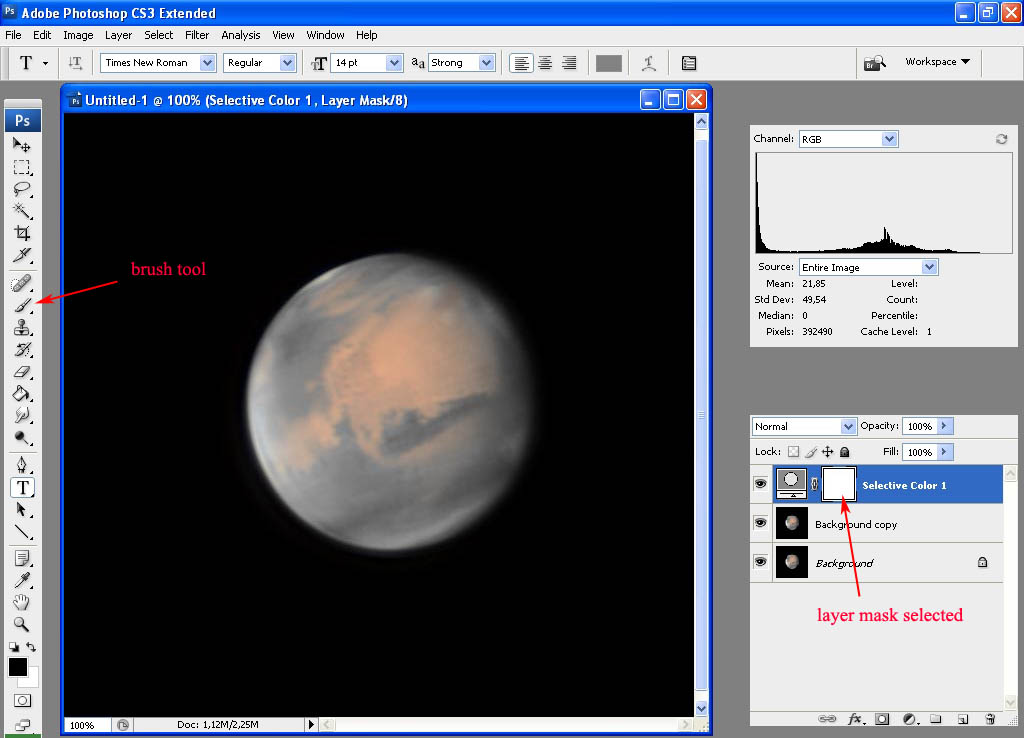 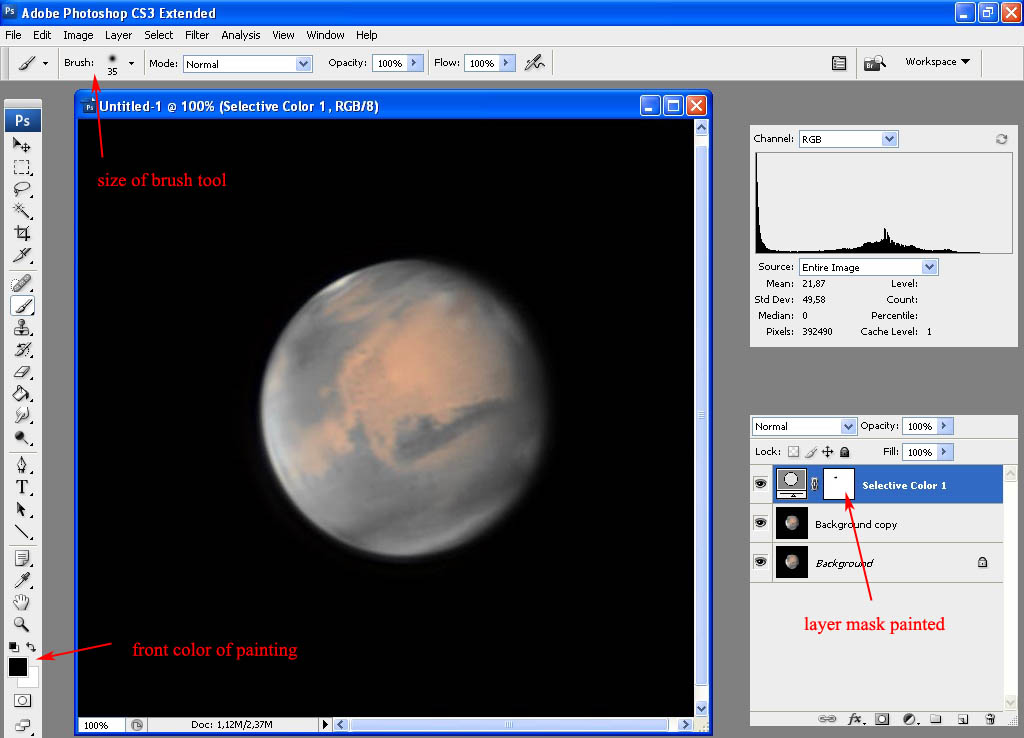 To see the tull layer mask alone you can Alt + click on it. It will be showed in a new window. You can work on it, also. It is a good ressource to see and analyse the quality of the painting. 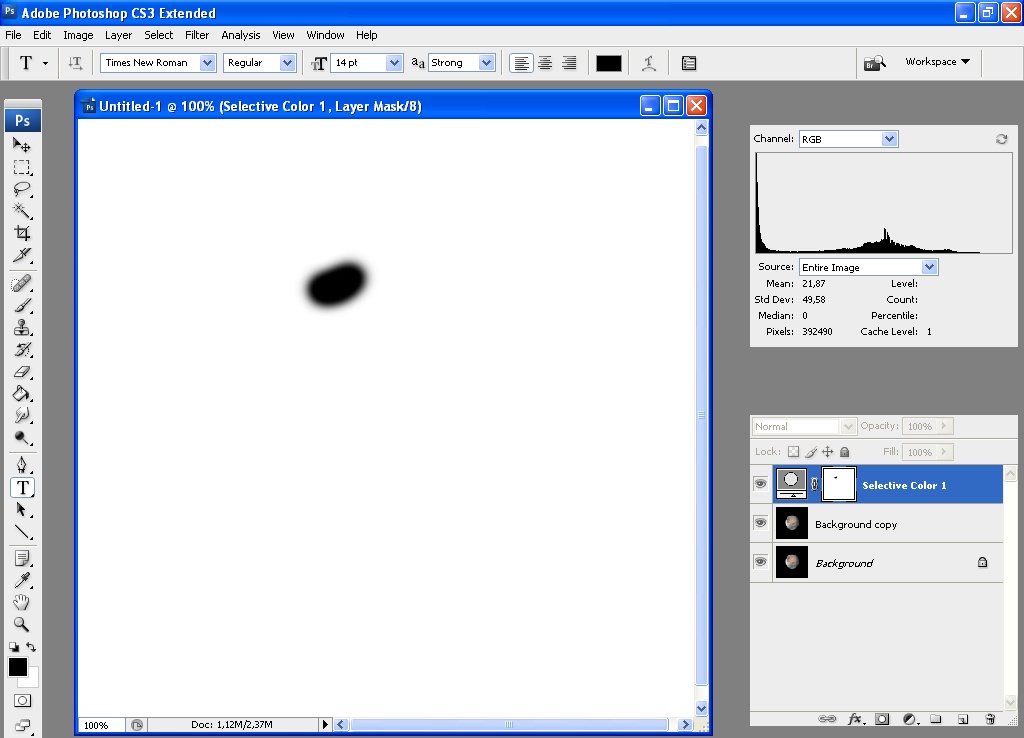 To return to others layers, normal click on any one other layer. This deactivate the full view of the layer mask. It is ok for me. Thus, I deactivate the visualization of background layer and do merge visible (layers): Menu Layer > Merge Visible 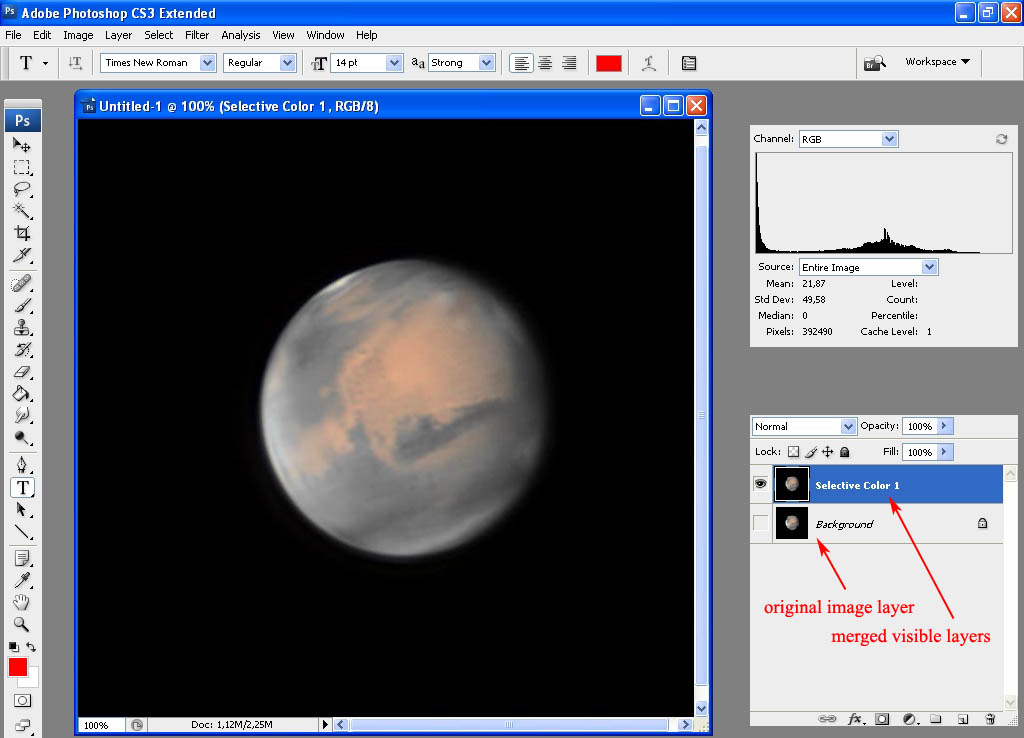 2) Enhancement of neutral colors of image.To enhance the neutral colors of the image I do the same Selective Color adjustment, but now with the neutral color tab. 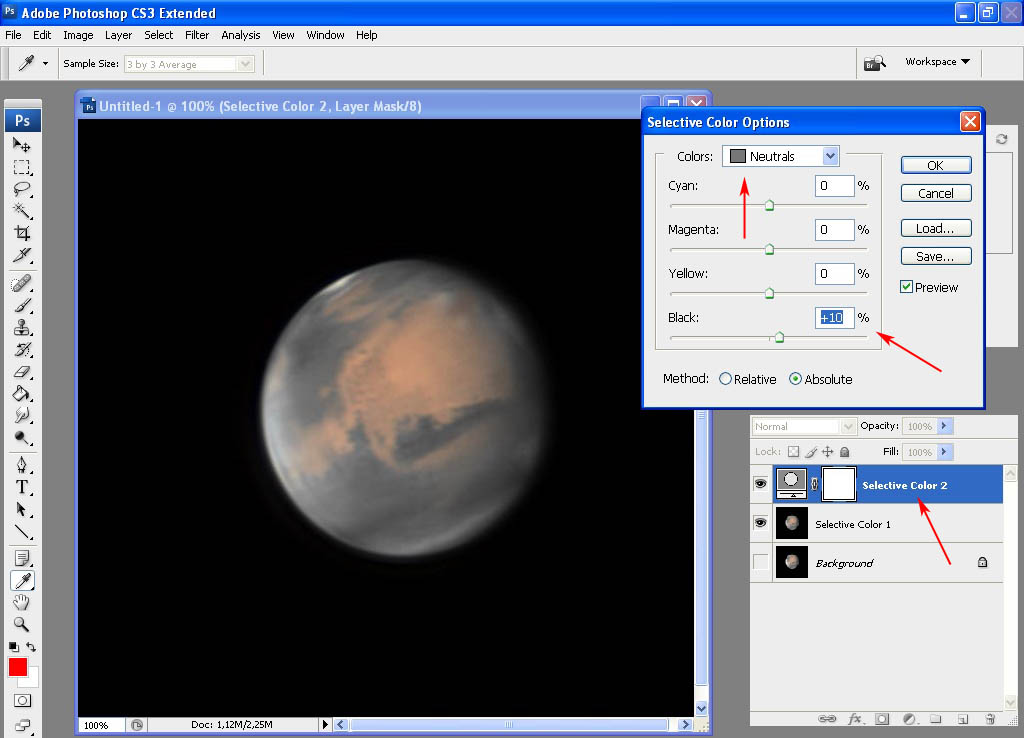 It is ok for me. I do merge visible again. 3) Enhancement of colorI use the saturation ressource. 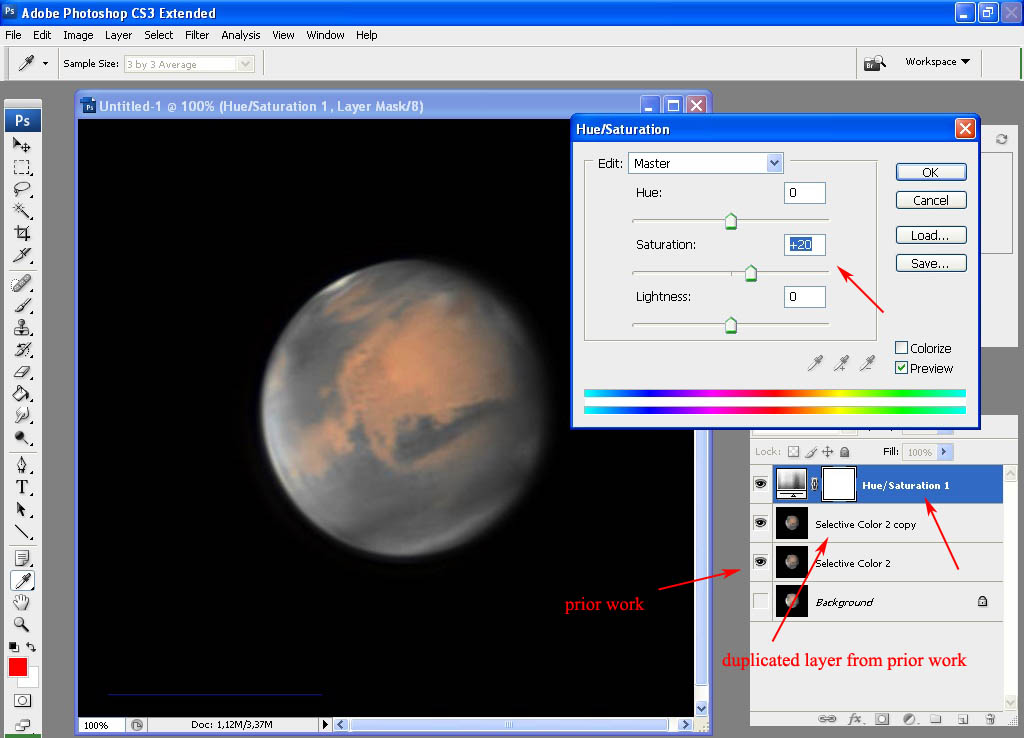 It is ok for me. I do Merge Visible, again. 4) Sharp of imageI have two different procedure to sharp images. Sometimes I use both, one after another. a) using the Menu Filter > Sharpen > Smart Sharp b) using a more complex action: - duplication two times of the layer - the last duplication I change the blend mode from normal to softlight - use of Filter > Others > HighPass To you see the difference: Using Smart Sharp proccess 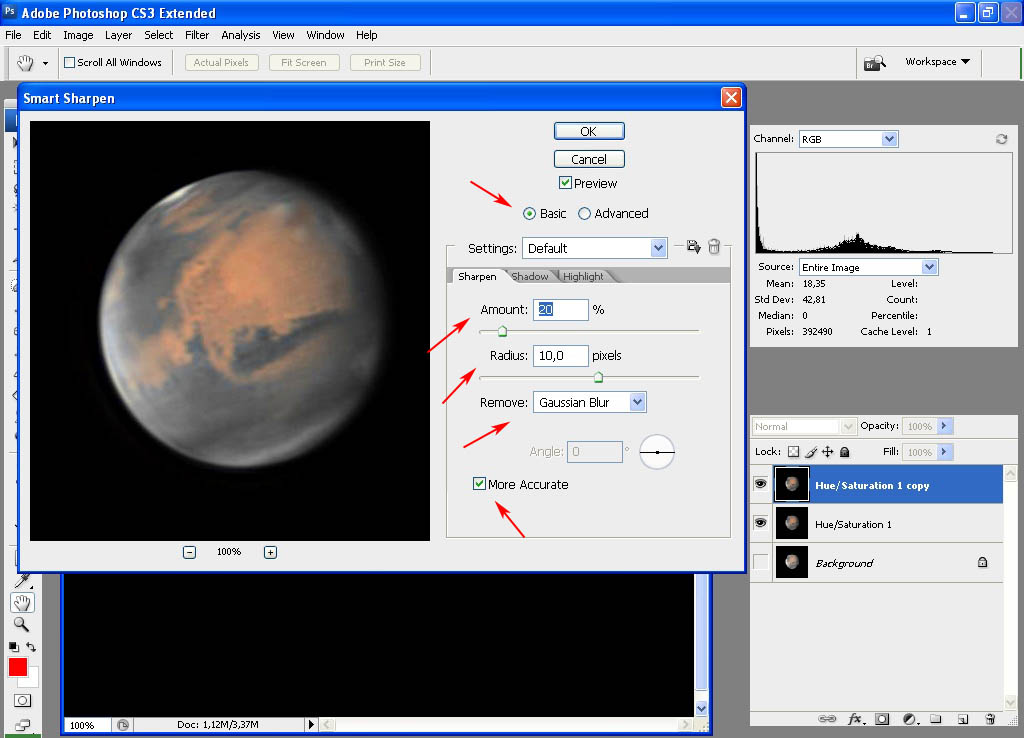 Using softligh blend 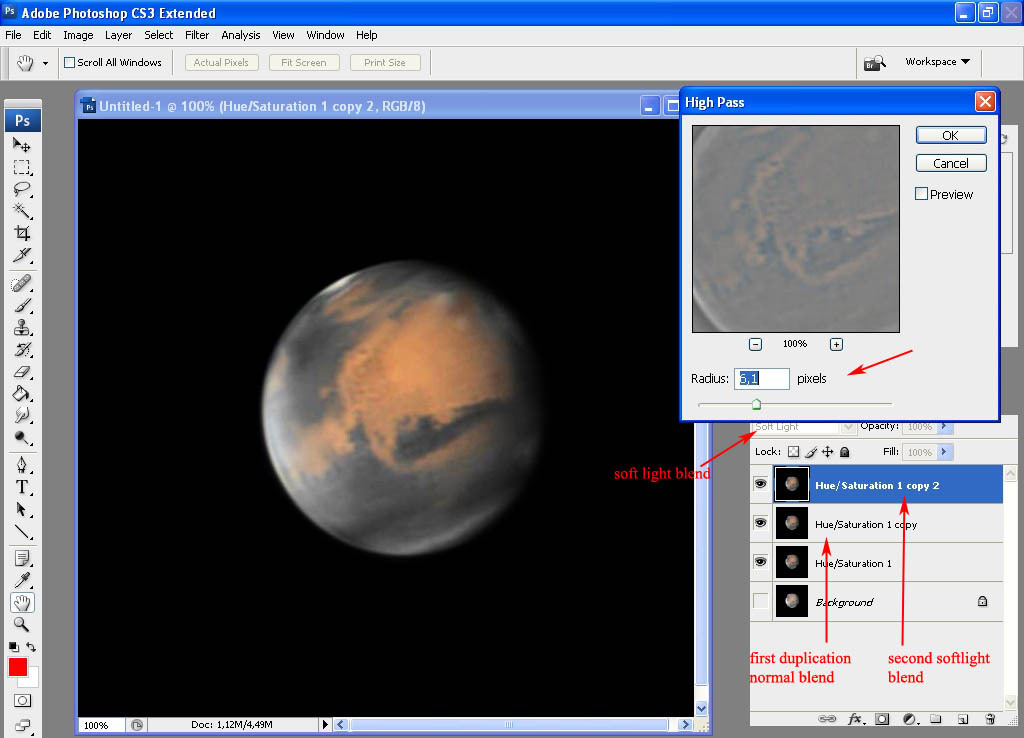 You can try them; chose the better appearance. I did both. First I did SmartSharp, after I duplicated two times this smartsharped layer to use the SoftLight sharp. I did again the Selective Color to reduce the white intensity as did above, using mask to don't reduce the Mars polar area. Identical to item 1. 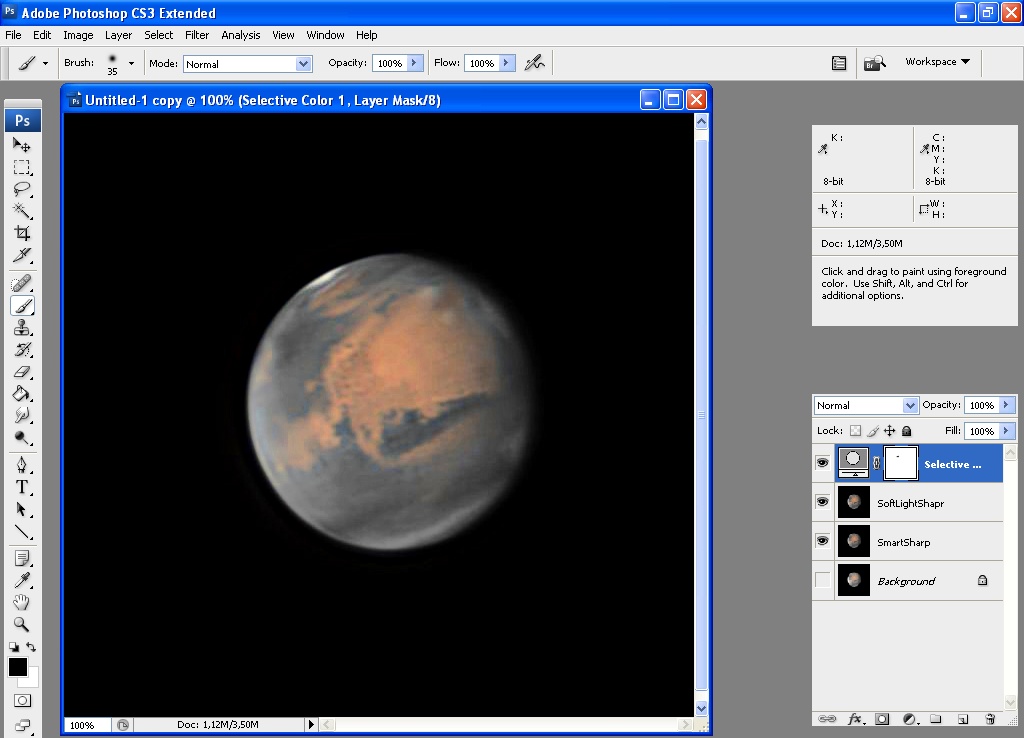 As sharpen cause some noise, I used the noise reduction plugin Ximagic-Xidenoiser (you can use any one, or the same filter in Fitswork) filter type NLM. 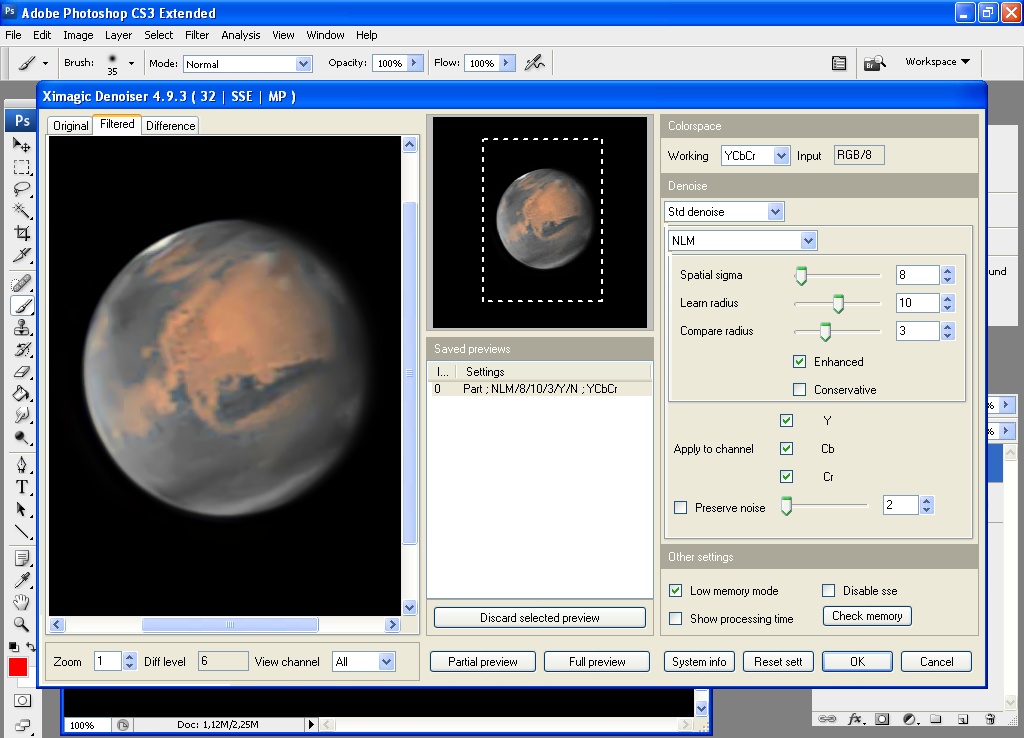 The value of filters and accuracy of procedures can change the result. Now, the final image is: 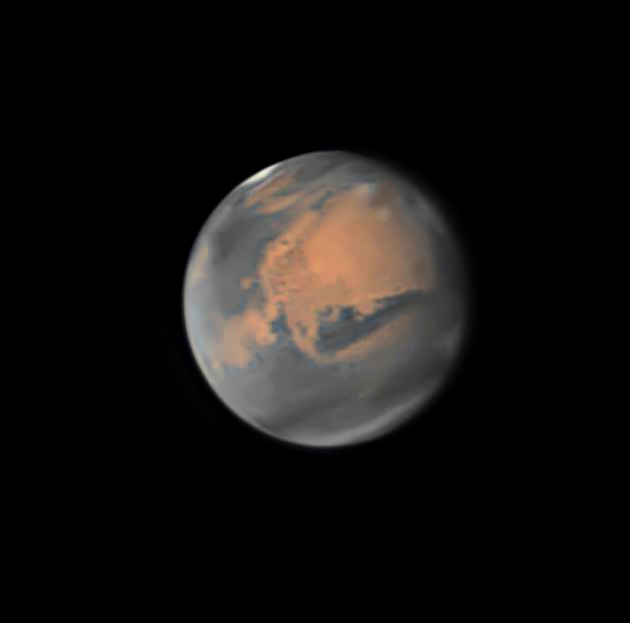 note: I never do the same, or with the same filters values, each time I process an image. It depends from my current inspiration ! So, sometimes I feel the result as good, and later I do as bad.
GSO 305 mm
NEQ6 Pro - Roda 5 Filtros Manual Guia: OAG TSOAG9T2 - ASI120MC Cannon EOS T3 - QHY163M ASI120MC, DSI-1 Meade e SPC880 |
«
Retornar para Processamento Gráfico de Astrofotos
|
1 visualização|%1 visualizações
| Free forum by Nabble | Nabble® |

